


Read our top tips for what to take on an Antarctic holiday
Buying the kit
Going to Antarctica is obviously going to mean that you will have to wrap up warm. Now, the Antarctic Peninsula in summer is nothing like as cold as the South Pole, and there is no need for hideously sophisticated cold-weather kit, but taking the right clothes is nonetheless something that needs a bit of thought.
We bought most of our kit in Keswick, a splendid town in the English Lake District. The great thing about Keswick is that it has many shops selling outdoor kit, which are almost without exception staffed by fantastically knowledgeable and helpful staff. There's something you don't often see in London. We bought a lot of our kit from George Fisher (which, even by Keswick's high standards, has exceptionally helpful staff) and Cotswold Outdoor, but really, most of the shops in Keswick would be just as good.
Keswick is, of course, a long way from where we live in London, so we had to combine our Antarctic-kit-buying trip with a holiday in the Lake District. It's a tough job, but somebody has to do it!
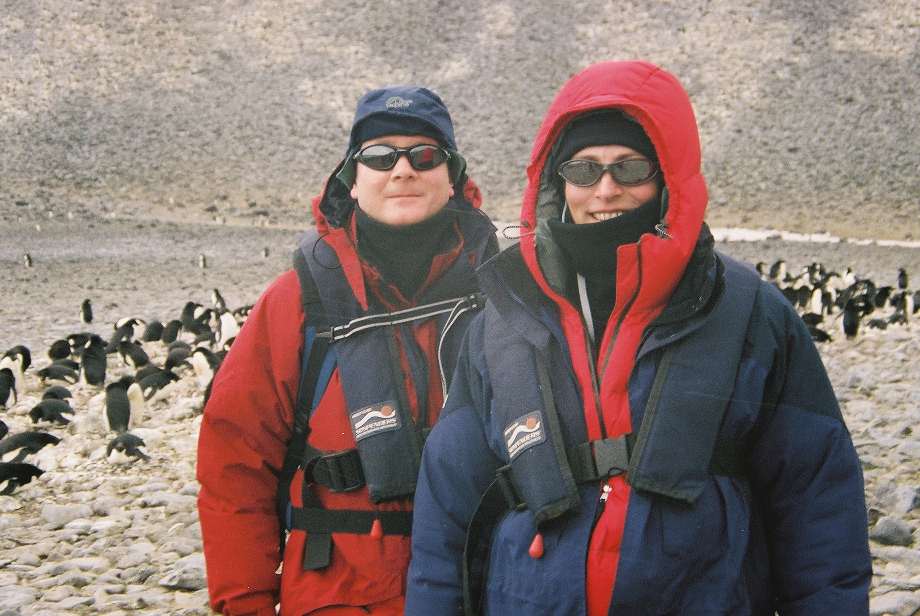
Us wearing our Antarctic kit |
Needless to say, there is quite a wide range of outdoor kit available at all sorts of prices, but this would not be a good time to try to save money by buying inferior kit. We made sure we bought good quality stuff, and were very glad we had done so. Much of our kit was made by Berghaus, which seems to provide a consistently high quality and which we would thoroughly recommend. We also had some stuff made by Lowe Alpine, The North Face, and Helly Hanson, which was also very good. All those brands seemed to be popular with the other passengers on the ship too. |
Back to top
The clothing
One of the most important piece of kit, if not the most important, was a waterproof jacket. They really have to be made of Gore-Tex. Don't believe a shop assistant who tells you that some other waterproof jacket is 'as good as Gore-Tex'. It won't be. We've tried other materials, and they are never truly waterproof and breathable in the way that Gore-Tex is. Not that it rains much in Antarctica, but you can get comprehensively splashed while travelling between ship and shore in the Zodiacs, especially if the water is a bit rough. By the same token, good waterproof trousers are also essential.
Underneath the waterproof jacket, we had down-filled jackets to keep us warm. Down has the advantage of being not only very insulating, but also very lightweight and easy to squish into a small space in the luggage (one of the most important considerations for Antarctic kit, as you are going to have to get all your kit into what you can take on a plane with you, unless you want to drive to Ushuaia). The secret to keeping warm, as I'm sure you already know, is to wear multiple layers. We therefore had various lightweight clothes to wear under the down jackets, and could vary the number of layers according to how cold it was and which one of us was wearing them (Carolyn is much more susceptible to the cold than Adam, who has plenty of built-in insulating layers). The Helly Hanson base layers were excellent here, as they were both warm and very light. Traditional thermal underwear is made of 100% polypropylene, and that does work, but we found that the type with 36% wool was very comfortable and warm, and also gets a lot less pungent with repeated wear.
We both wore two layers of socks. Adam's favoured combination was a thin but warm inner sock and an even warmer outer sock. Carolyn opted for two layers of thick walking socks. The 'Smartwool' Expedition socks are brilliant, though expensive. The other bits of clothing we had to keep us warm were two layers of gloves (waterproof mittens as the outer layer), mountain hats, and, probably the most useful bit of all our kit, a windproof snood each. Although the temperature was never very low (no colder than about 2 degrees below freezing), it could feel bitterly cold when the wind was blowing, and being able to cover up most of our faces was a huge advantage.
Back to top
The boots
We were a bit surprised to read in the instructions that came with our tour that knee-high rubber boots were recommended for shore landings, although of course they were indeed essential: often we had to step into several inches of water when landing from the Zodiacs, and we would have got very wet feet on many occasions had we been wearing our hiking boots. We had neoprene-lined boots made by Hunter, which had the advantage of being not only waterproof, but also warm. Our tour instructions suggested buying rubber boots a size larger than normal and bulking up with inner soles and socks for warmth. That proved to be unnecessary with the neoprene-lined boots. Carolyn bought a large-ish size and found that, even with unfeasibly thick sock layers, there was a tendency for her feet to slip around when walking on rocks and steep terrain. A better fit would have been preferable. We also took lightweight, waterproof hiking boots (Gore-Tex again), which were great for walking around on deck on the ship, especially if the seas were a bit rough and the decks were wet.
Back to top
Miscellaneous bits of kit
Another item that we both took that we were extremely pleased to have with us was good quality sunglasses: the type that give a generous amount of wrap-around. On a sunny day, the glare from the snow can be pretty intense. Even on cloudy days, it can be very bright, and the glasses also protect your eyes somewhat from the wind.
Probably the least useful kit we took was a pair of walking poles. They were awkward to carry into and out of the Zodiacs, and mostly useless ashore. They don't help much in very deep snow, and when we weren't in snow we were on pebbly beaches or among rocks where the poles weren't really necessary. I suppose if we had been trailblazing and probing the snow they might have helped, but to be honest on this kind of trip the guides do that for you. (Our guides never used poles.) After the first landing, the poles stayed in our cabin for the rest of the voyage.
Adam always took ashore a backpack with a waterproof liner and a waterproof cover — stuff really does get seriously splashed and wet in the Zodiacs. Carolyn preferred to put stuff in a bumbag (worn in front for ease of access) or to hang things around her neck or stuff them in her pockets. She felt it was slow and inconvenient to keep taking off a backpack to get stuff out, and the backpack straps could get caught on the lifejacket that you have to wear at all times on shore trips. Whatever you opt for, you must have your camera, binoculars, etc inside something completely waterproof while you are in a Zodiac. We bought clear plastic camera bags, with neck straps, that are actually designed for divers taking pictures underwater. You can take photos through the sealed bags, but we found that awkward, and mostly used the bags just for transit.
Back to top
Optical equipment
Your choice of binoculars is down to individual preference, of course. Adam took a pair of Nikon Sportstar 10 x 25 bins which were small, light and portable, but with hindsight would have chosen a pair with a larger field of view and slightly lower magnification like Carolyn's. She chose a pair of Bushell H20 8 x 42 bins. The Bushells were heavier to lug around, and have lower magnification, but the larger field of view gives much better and steadier visibility, especially when watching, say, birds in flight from a moving ship's deck. Both the Nikons and the Bushells are classed as waterproof and fogproof (but we still wouldn't recommend getting them doused in seawater). Carolyn also took a small pair of Pentax Jupiter 10 x 20 binoculars, for lightness/portability, but in fact she almost always used the Bushells. Neither of us would particularly recommend the small, high-magnification binoculars for this kind of trip.
For photography, Adam took a 20-something-year-old Pentax SLR (and 10 rolls of film, which was only just enough), which still takes excellent photos, and Carolyn took a brand new digital camera. The picture quality isn't quite as good as 35 mm, but really, the photos are perfectly good enough for most purposes. All the photos in our photo album on this website are marked with whose camera took them, so you can see for yourself: we'd be amazed if you notice a difference in picture quality on these web versions. The advantages of the digital camera probably outweighed the disadvantages: particularly being able to see the photos immediately to have instant feedback on what worked and what didn't. We took a laptop computer with us so that we were able to have a good look at the digital photos at the end of each day (and also make a backup copy). Our biggest regret as far as the photography was concerned (in fact, probably our biggest packing regret overall) was that we hadn't taken a more serious telephoto lens. It's hard to get good photos of penguins without one.